
Learn how to create an Era Write campaign, add keywords, choose article settings and generate human-quality SEO content with screenshots.
A campaign is a list of keywords plus the settings that apply to all of them. Each keyword becomes one article. Set it up once, and Era Write works through the list on its own.
The wizard has five steps and takes a couple of minutes. Nothing is charged while you are filling it in.
Before you start
Two things are worth having ready:
- Your keywords. A plain list is enough. You can paste them all at once.
- Credits in your account. Each article costs credits based on its length — the wizard shows the cost per article at the top before you commit to anything.
A connected WordPress site is optional. Without one you can still generate articles and keep them in your library — you just cannot publish straight to a site.
Opening the wizard
In the left menu, click New campaign. It is also the button in the top right of every screen.
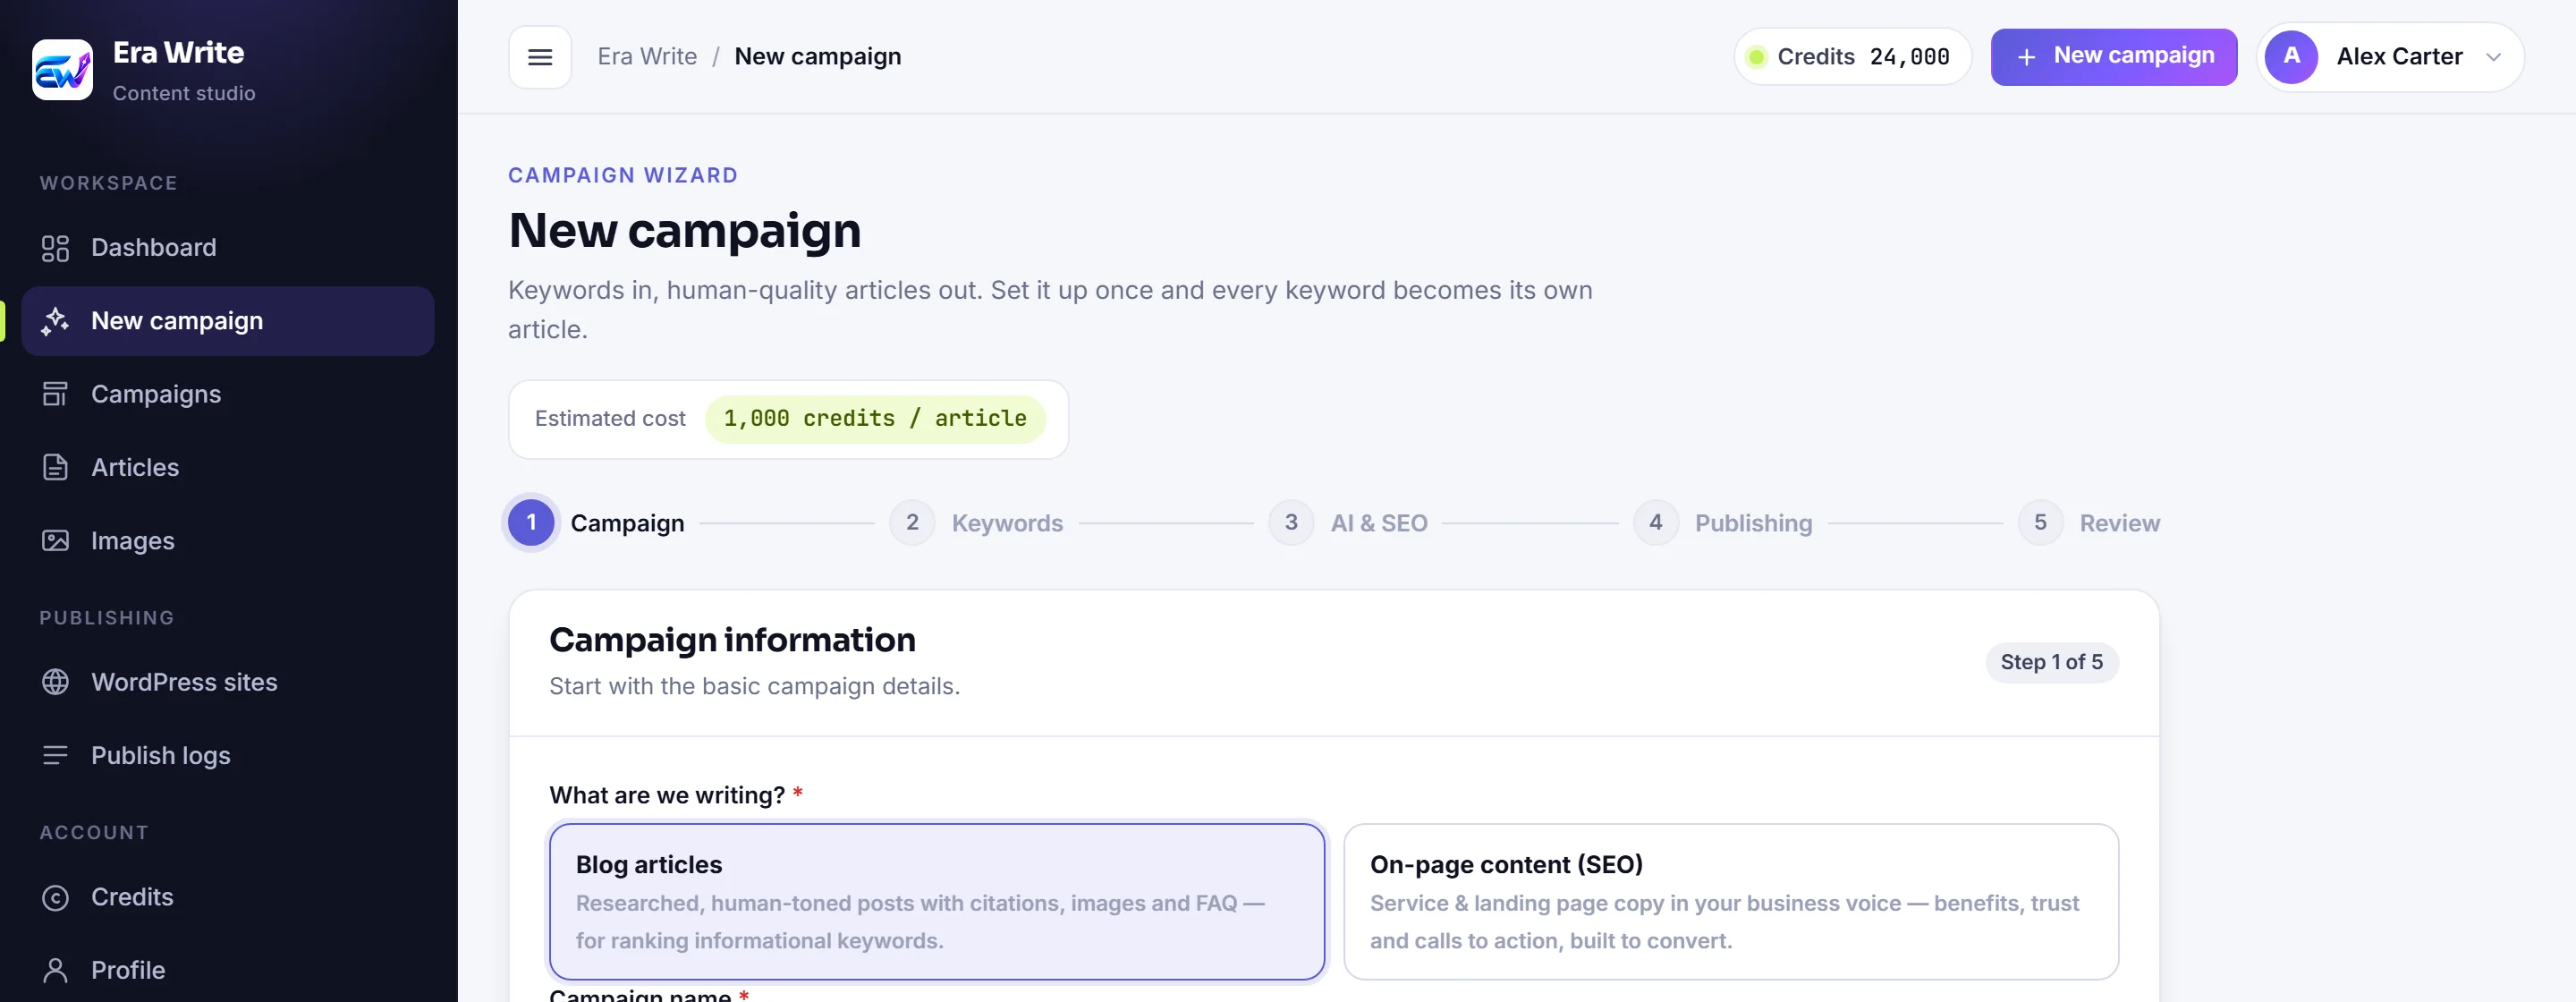
The five steps are shown across the top, so you always know where you are.
Campaign information
First, tell it what kind of content this campaign produces. This changes the rest of the wizard, so it is worth getting right:
- Blog articles — researched posts with citations, images and an FAQ. Choose this for keywords people are searching to learn something.
- On-page content (SEO) — service and landing page copy written in your business voice, built to convert. Choose this for pages that sell. This option asks a few extra questions about your business further down the step.
The rest of step 1
- Campaign name — just for you, so you can find it later. Something like USA Roofing Campaign.
- Target country — affects local wording, currency and place names. Leave it on No specific country if the topic is global.
- Search intent — leave this on auto-detect unless you have a reason to override it.
- Target audience — who the article is written for.
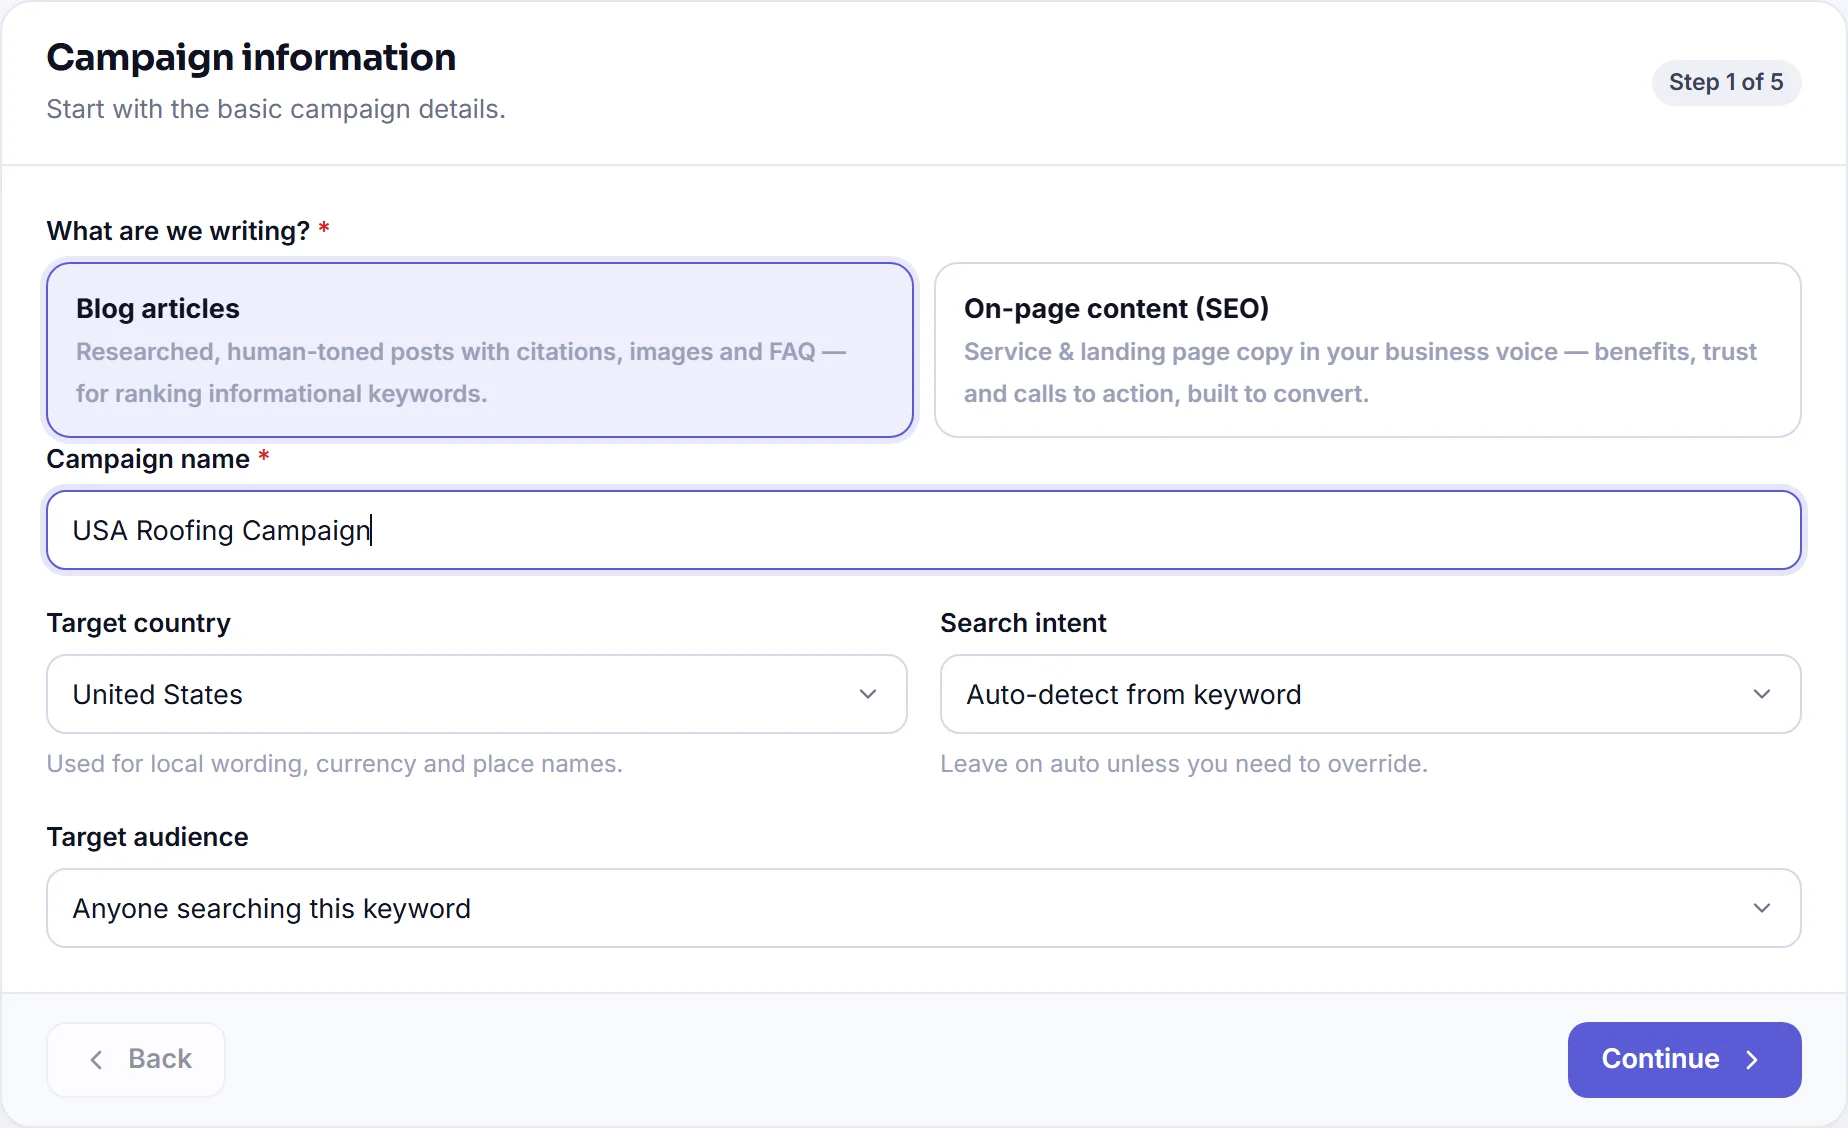
Click Continue.
Keywords
This is the important step. Every keyword you add here becomes one article, so four keywords means four articles.
Type a keyword into the first row, then click Add keyword for the next one.
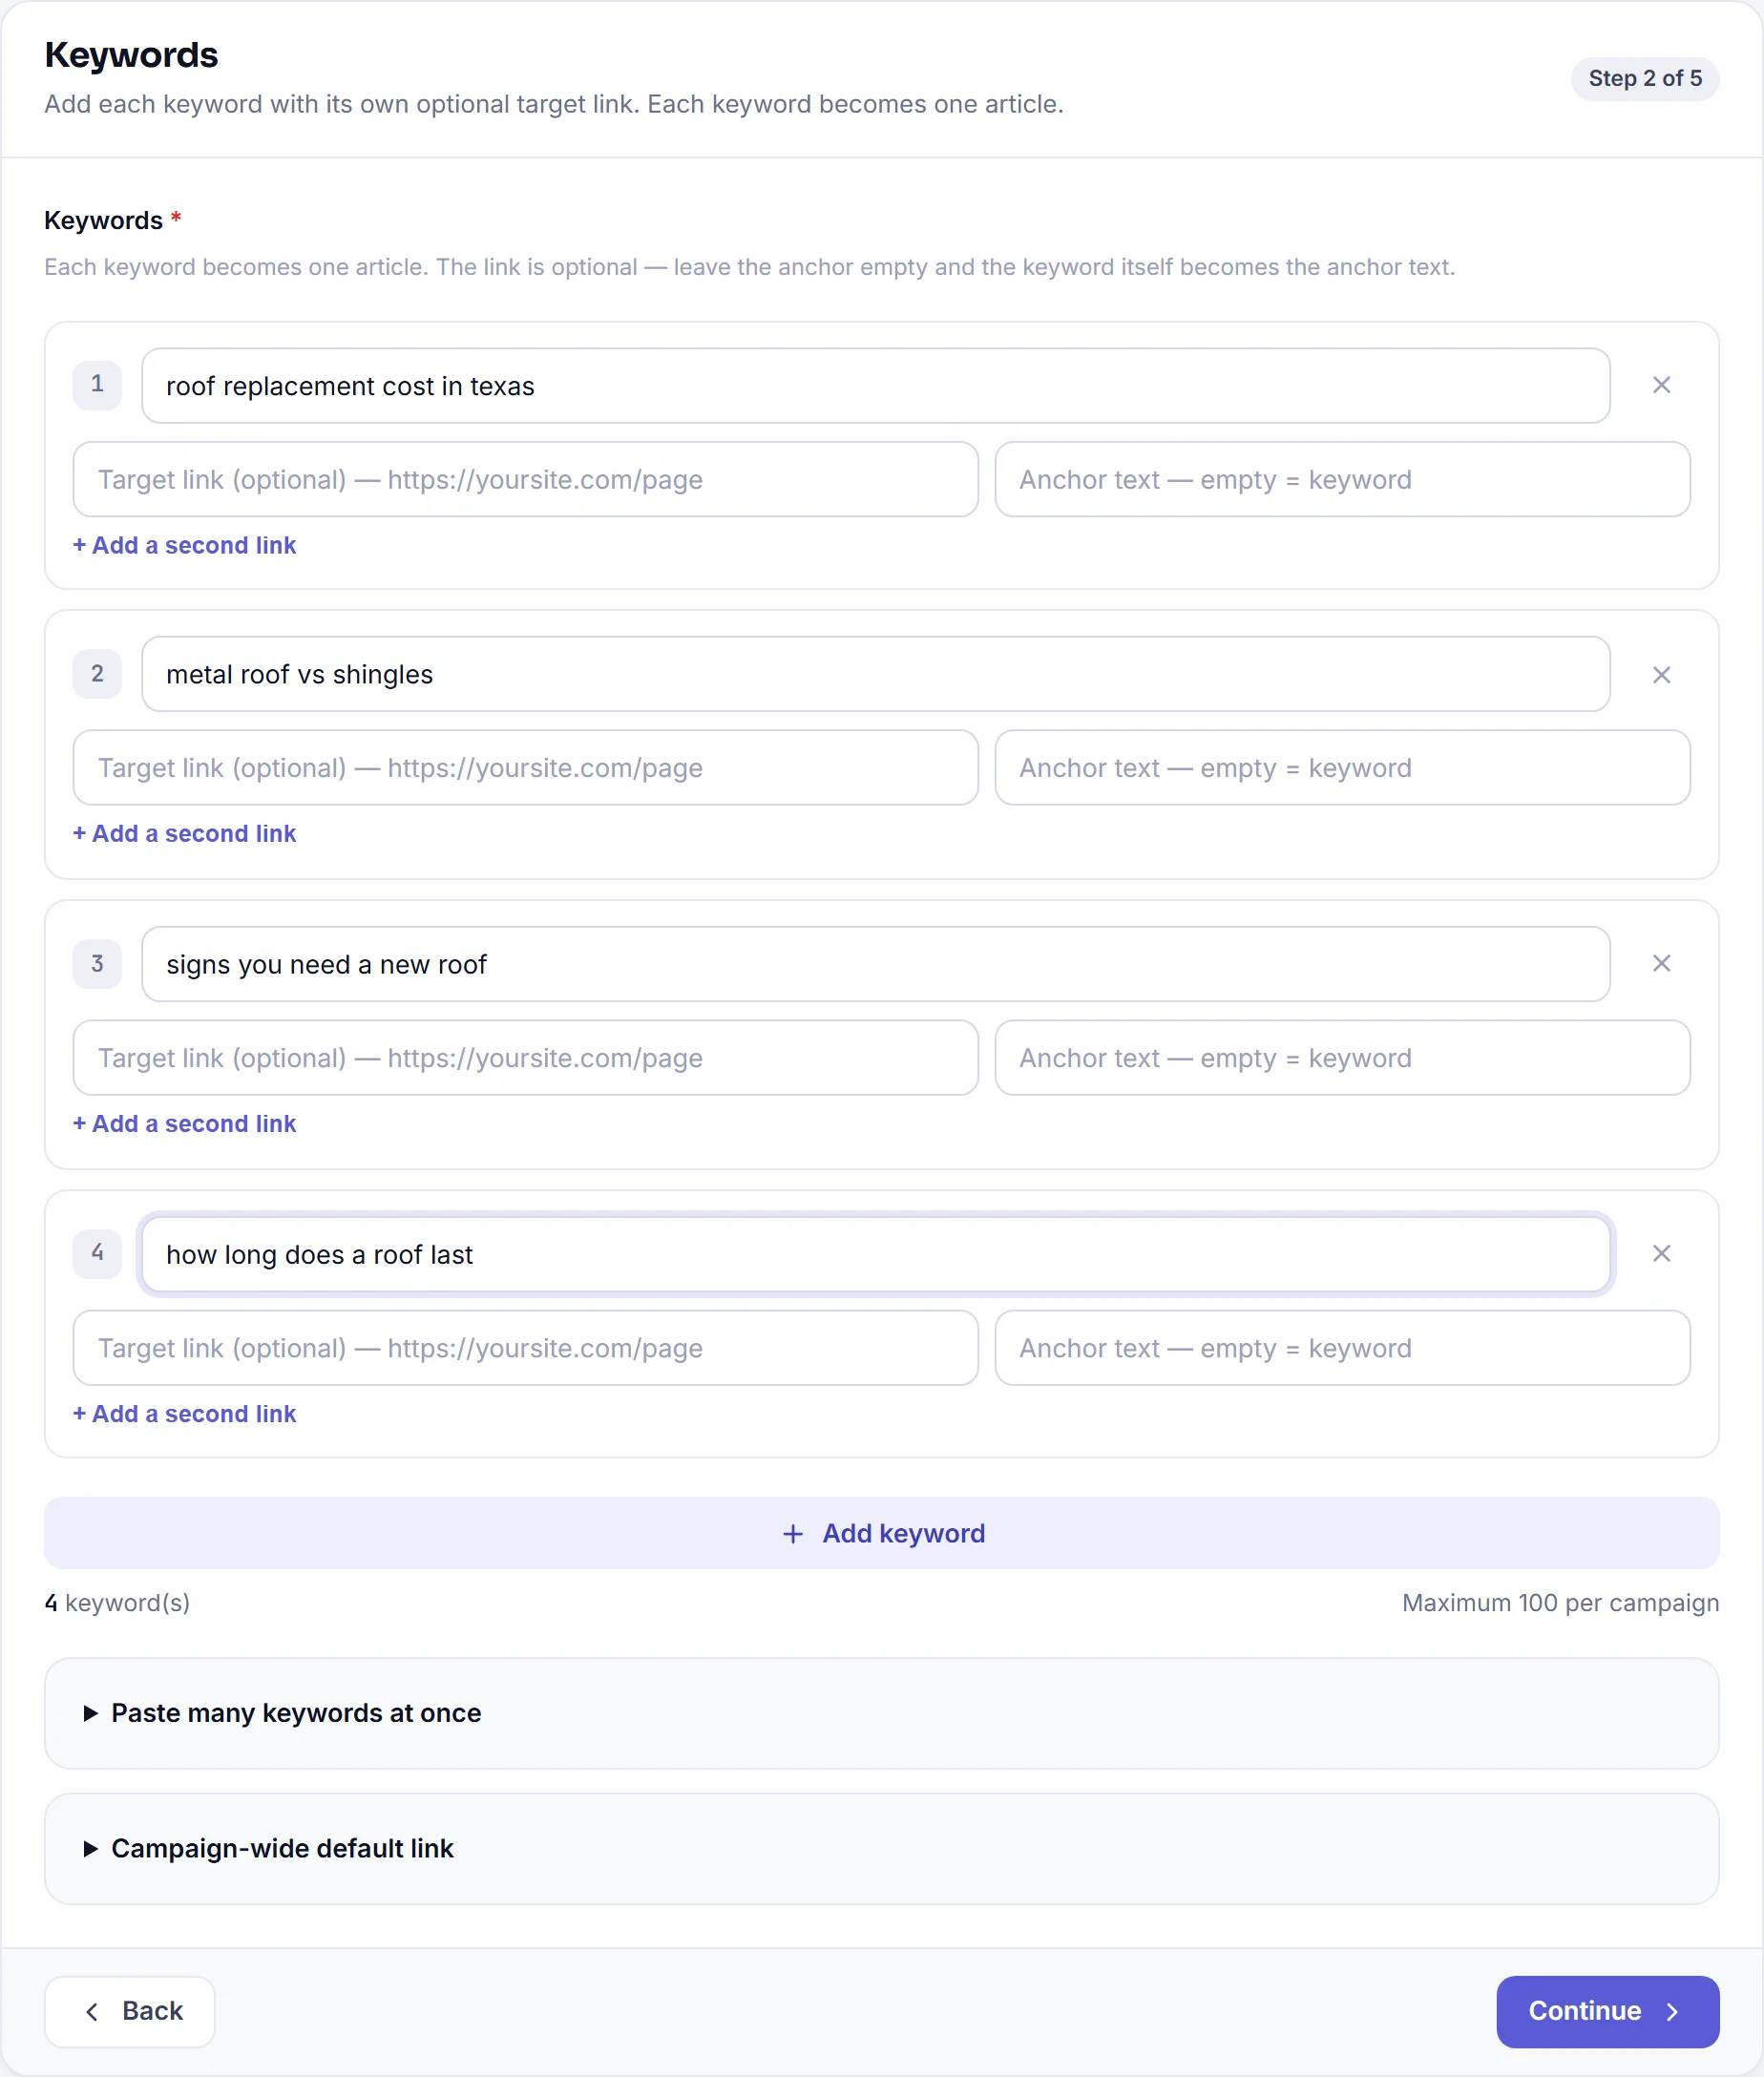
The optional link
Under each keyword there is a target link and an anchor text box. Both are optional. Fill them in when you want that article to link to a particular page of yours — the anchor is the clickable words. Leave the anchor empty and the keyword itself becomes the anchor text.
Shortcuts
- Paste many keywords at once — open this panel and paste one keyword per line. Duplicates are merged with the rows above.
- Campaign-wide default link — one link used for every keyword that has no link of its own. Useful when the whole campaign should point at the same page.
Up to 100 keywords in a single campaign. Beyond that, split it into two.
Writing & SEO settings
These apply to every article in the campaign, not to one keyword.
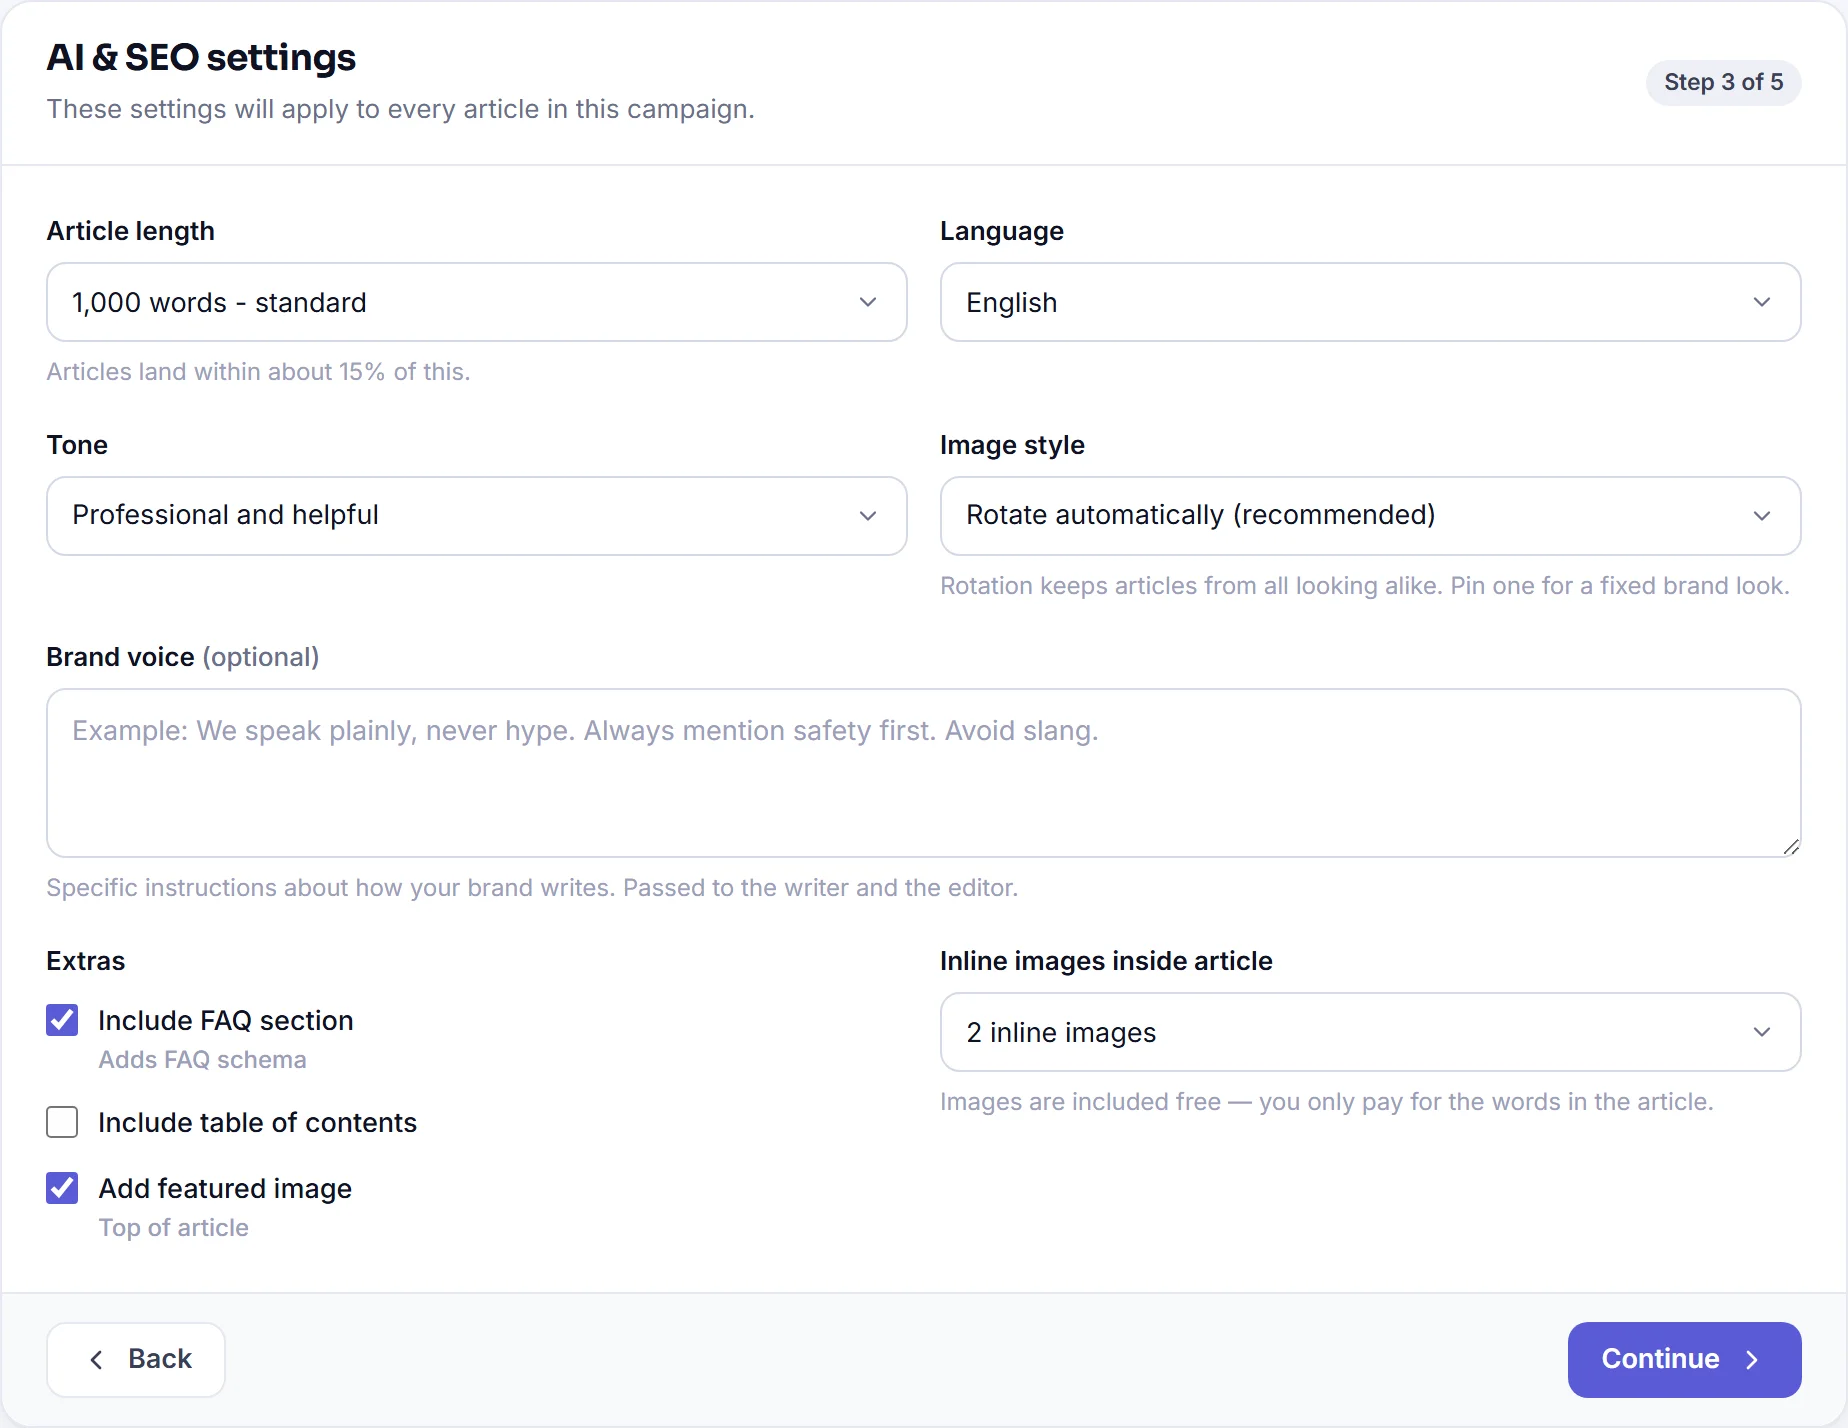
- Article length — finished articles land within about 15% of what you pick. Longer articles cost more credits.
- Language and Tone — how it should sound.
- Image style — leave it on Rotate automatically and your articles will not all look alike. Pin a single style if you need a fixed brand look.
- Brand voice — optional, and the most underused box here. Plain instructions like "We speak plainly, never hype. Always mention safety first." are passed to the writer and to the editor.
- Extras — FAQ section (which also adds FAQ schema), table of contents, and a featured image at the top.
- Inline images — how many pictures go inside the article body.
Images are included free. You only pay for the words in the article.
Publishing
What should happen to each article once it is written?
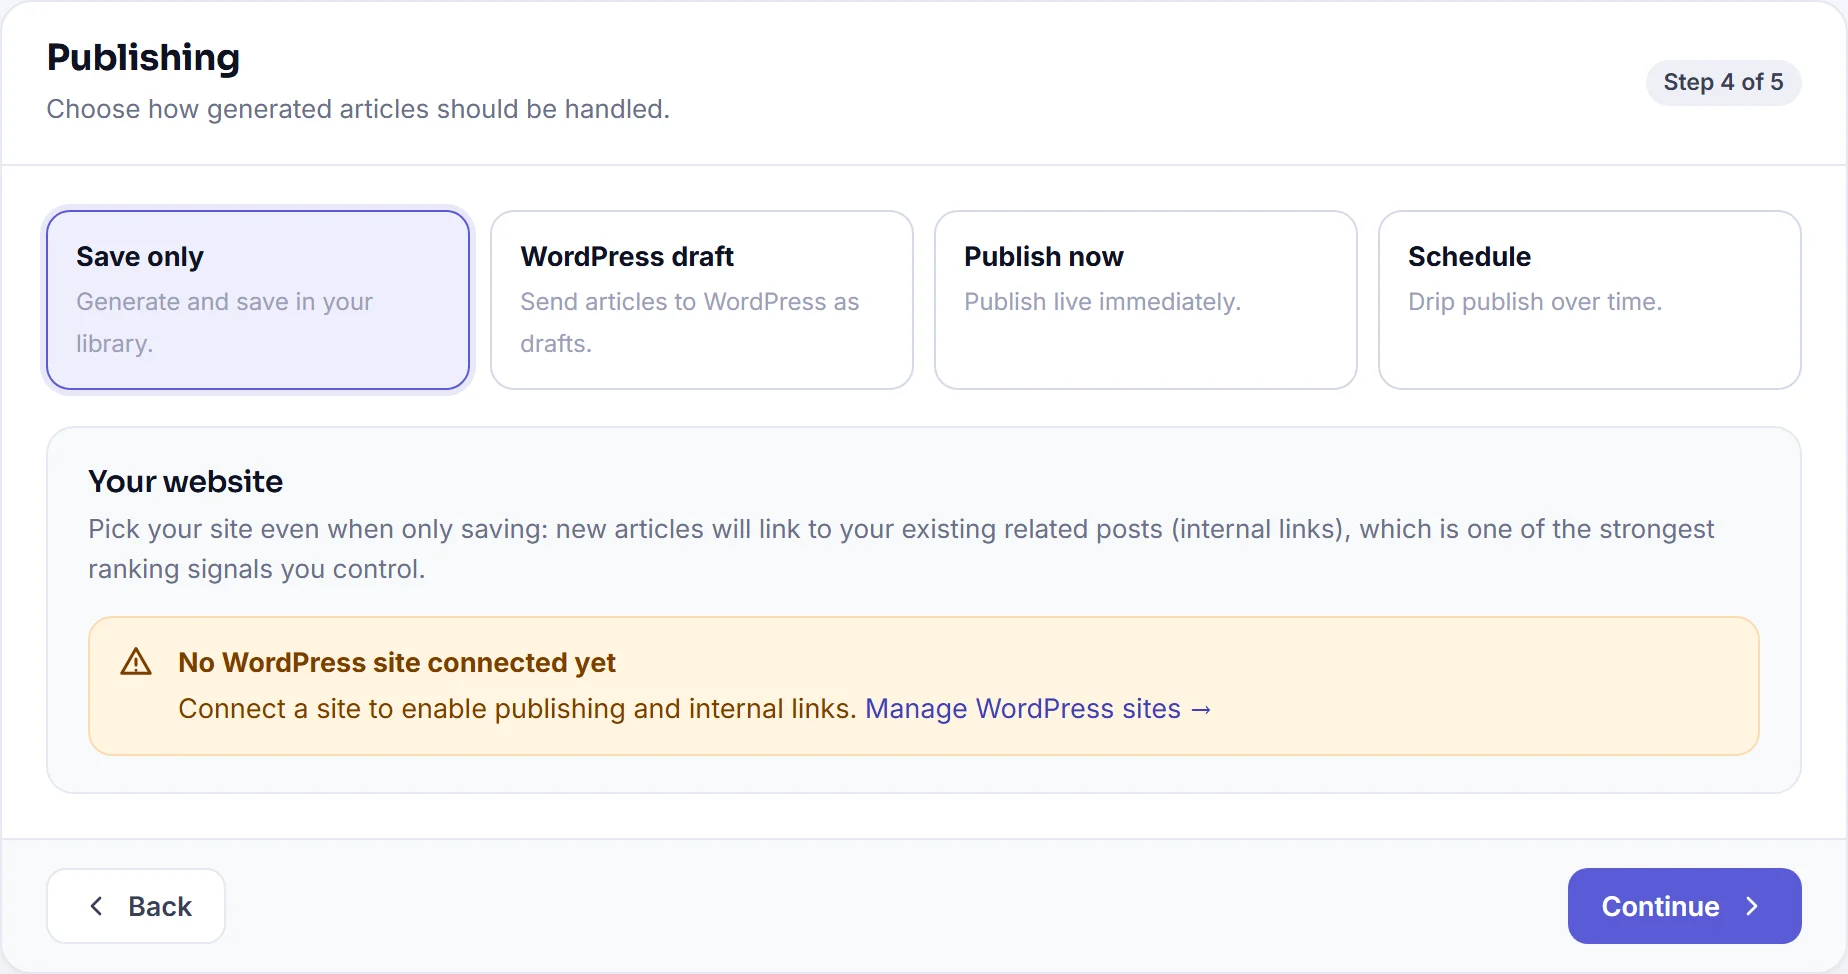
- Save only — generate and keep it in your library. Nothing is published anywhere.
- WordPress draft — send it to your site as a draft, for you to review and publish.
- Publish now — publish live as soon as it is finished.
- Schedule — drip-publish over time, one article every so often, so a batch does not all land on the same day.
Pick your site even on "Save only"
The panel below the modes asks which of your websites this campaign belongs to. It is worth filling in even when you are only saving: new articles will link to your existing related posts, and internal linking is one of the strongest ranking signals you actually control.
If you see "No WordPress site connected yet", that is only a warning — you can still finish the campaign on Save only. Connect a site from WordPress sites in the left menu whenever you are ready.
Review & launch
The last step is a summary: the campaign name, how many articles it will produce, the length and what happens after each one is written. Check the article count — that is what you are about to spend credits on.
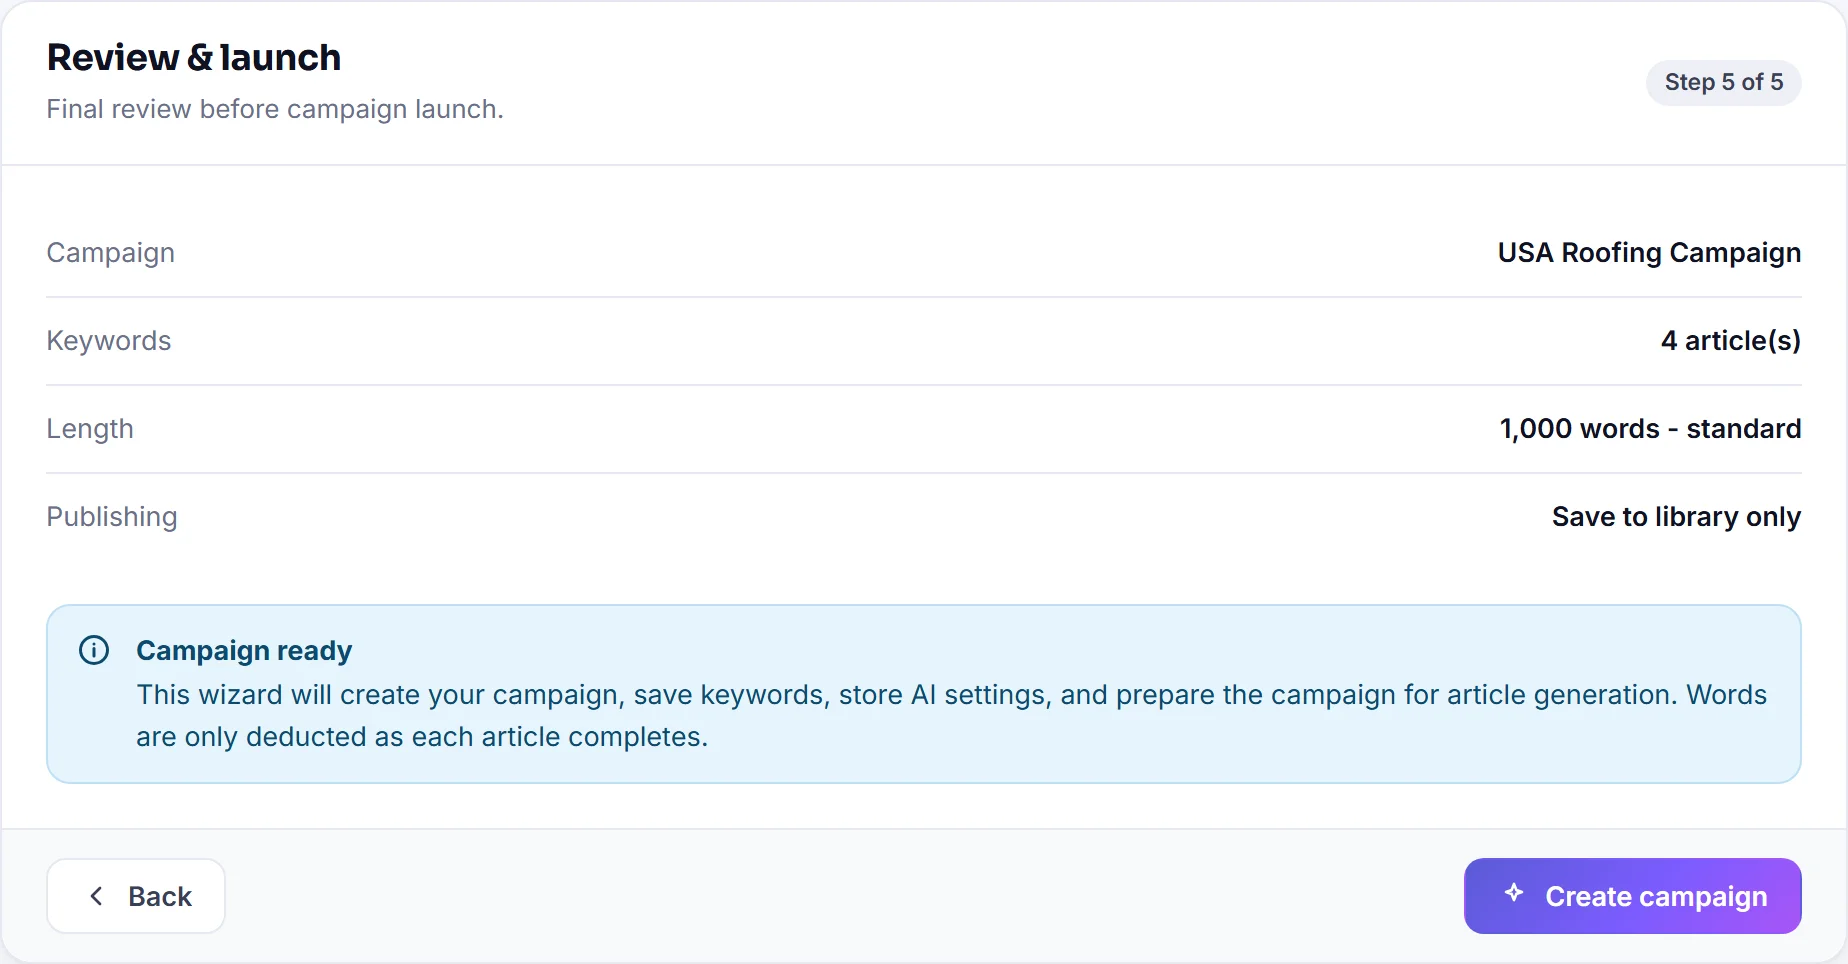
Anything wrong, click Back. Otherwise click Create campaign.
Credits are deducted as each article completes, not all at once when you launch. If you stop the campaign half way, you have only paid for what was actually written.
What happens next
The campaign is created and the keywords go into the queue. Articles are written one after another rather than all at once, so a big campaign fills in over time instead of arriving in one lump.
You can follow it from the left menu:
- Campaigns — the campaign itself, and how far through the list it is.
- Articles — every finished article, ready to read, edit or export.
- Publish logs — if you chose one of the WordPress modes, what was sent and when.
You do not have to keep the page open. Close the tab and come back later — the queue keeps going without you.